Sup BloominBasket https://goo.gl/5M55BP
Anita
Thursday, August 09, 2018
Friday, February 16, 2018
Tuesday, August 12, 2014
The Newfoundland Slipper Pattern
Finally found this very old pattern, I'm parking it here so I don't lose it again! The original slipper shows a map of Newfoundland, but any motif that fits can be used. Snowflakes, reindeer…whatever pleases.
If this is still in some kind of copyright, please let me know and I will remove it immediately. I haven't been able to locate any other information.


If this is still in some kind of copyright, please let me know and I will remove it immediately. I haven't been able to locate any other information.
Friday, August 08, 2014
Yep, I want cake!
1 cup sugar
1/2 cup butter
1 tbsp. grated orange rind
2 1/2 cups cake flour
1/4 tsp baking soda
2 1/2 tsp baking powder
1/2 cup orange juice
1/2 tsp salt
1/2 cup cold water
4 eggs, separated
1/2 cup sugar
Optional garnish: Whipping cream and orange zest
Preheat oven to 350F and grease and flour a 13 x 9 inch rectangle pan.
Beat sugar, butter and orange rind at medium speed.
In a medium bowl sift together cake flour, baking soda, baking powder.
Add orange juice and salt and mix.
Add cold water.
Add mixture to your sugar/butter mixture.
Beat egg whites until frothy and gradually add 1/2 cup sugar.
Fold egg whites into batter and pour into greased and floured pan.
Bake for 25-30 minutes until a fork comes out clean.
Let cool slightly and serve with whipping cream.
Original Moist Orange Cake Recipe Recipe found at Grandmothers Kitchen Recipes.
Ingredients
1 cup sugar
1/2 cup butter
1 tbsp. grated orange rind
2 1/2 cups cake flour
1/4 tsp baking soda
2 1/2 tsp baking powder
1/2 cup orange juice
1/2 tsp salt
1/2 cup cold water
4 eggs, separated
1/2 cup sugar
Optional garnish: Whipping cream and orange zest
Directions
Preheat oven to 350F and grease and flour a 13 x 9 inch rectangle pan.
Beat sugar, butter and orange rind at medium speed.
In a medium bowl sift together cake flour, baking soda, baking powder.
Add orange juice and salt and mix.
Add cold water.
Add mixture to your sugar/butter mixture.
Beat egg whites until frothy and gradually add 1/2 cup sugar.
Fold egg whites into batter and pour into greased and floured pan.
Bake for 25-30 minutes until a fork comes out clean.
Let cool slightly and serve with whipping cream.
Original Moist Orange Cake Recipe Recipe found at Grandmothers Kitchen Recipes.
Thursday, August 07, 2014
Ingredients
Cake
3 ounces fine-quality semisweet chocolate
1 1/2 cups hot brewed coffee
3 cups sugar
2 1/2 cups all-purpose flour
1 1/2 cups unsweetened cocoa powder (not Dutch process)
2 teaspoons baking soda
3/4 teaspoon baking powder
1 1/4 teaspoons salt
3 large eggs
3/4 cup vegetable oil
1 1/2 cups well-shaken buttermilk
3/4 teaspoon vanilla
Frosting
1 1/2 cups (3 sticks) unsalted butter, room temperature
1 cup cocoa powder
4 1/2 cups powdered sugar
1/2 to 3/4 cup heavy cream, more or less as needed
1 1/2 teaspoons vanilla extract
Directions
Cake
Preheat oven to 300 degrees F.
Prepare three 9-inch square cake pans. Grease the bottoms with butter, line the bottoms with parchment paper and butter the paper.
Finely chop the chocolate and place in a medium-sized heat resistant mixing bowl. Pour the hot coffee over the chocolate and let the mixture stand, stirring occasionally, until the chocolate is melted and the mixture is smooth.
In a large bowl sift together sugar, flour, cocoa powder, baking soda, baking powder, and salt.
In another large bowl with an electric mixer beat eggs until thickened slightly and lemon colored (about 3 minutes with a standing mixer or 5 minutes with a hand-held mixer). Slowly add the oil, buttermilk, vanilla, and melted chocolate mixture to eggs, beating until combined well. Add the sugar mixture and beat on medium speed until just combined well.
Divide batter between pans and bake in middle of oven until a tester inserted in center comes out clean, 35-45 minutes.
Cool the layers completely in pans on racks. Run a thin knife around edges of pans and invert layers onto racks. Carefully remove parchment paper and cool the layers completely. Before frosting the cake, use a large serrated knife and carefully level off the top of each layer so they are completely flat.
Frosting
Beat butter in a large mixing bowl on medium-high speed until smooth and fluffy, 2 to 3 minutes.
Add cocoa powder and beat until incorporated. Add powdered sugar, 1/2 cup at a time, mixing well after each addition. As frosting thickens, add a few tablespoons of cream as needed.
Depending on the temperature and consistency of your frosting, continue alternating adding cream and powdered sugar, then continue beating until frosting is light and fluffy. Beat in vanilla.
Assembly
Level each cake layer by cutting off the domed top with a long serrated knife. Place one layer, flat side down, on a cake plate.
Spread on about 1/2 cup of frosting onto cake using an offset spatula. Position second layer on top and press to adhere. Repeat with another 1/2 cup of frosting, and then position final cake layer, flat side up.
Cover the entire cake with a just a thin layer of frosting, reserving the rest of the frosting.
Place the cake into the refrigerator for 15 minutes to set this thin layer of frosting.
Remove cake from refrigerator and cover with remaining frosting. You will find that it will be easier to spread onto the cake now.
Reserve some of the icing for piping decorative details if desired. Very nice served with ice cream.
Original Perfecty Delicious Three Layer Chocolate Cake Recipe Recipe found at Grandmothers Kitchen Recipes.
Wednesday, June 25, 2014
How is this even possible? Almost a year since last post! I will try to do better. It's just that life keeps getting all tangled up in my hair.
For now I leave you with this thought…our blueberries are ripe. That means PIE!
Yes...pie for dinner tomorrow, how decadently delicious is that! Moments like this are the whole reason I moved on from being five years old…just so I could have pie for supper whenever I want.
Think on that! And good night for now. :D
Thursday, July 11, 2013
Fried green tomatoes

Now and then someone asks how I make my fried green tomatoes, so I'm putting here. It's super simple, but most of my recipes are very easy.
Choose a nice green tomato or two, cut out the woody stem if it has one, and if you got it from a grocery store, it probably does.
Slice it as evenly as you can, about a quarter inch thick slices. The slices go into a small bowl of buttermilk to be coated nicely, then dredged in cornmeal or flour, your choice. I prefer cornmeal.
Then they go in a single layer in my iron frying pan that has a half inch of hot oil in it...let them cook til browned, turning them once.
Sprinkle a little salt on them and enjoy!
Wednesday, May 15, 2013
Easy Bread.

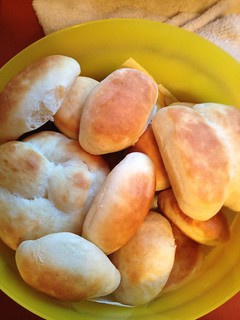
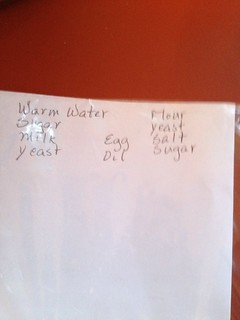
Okay, today I will post a semi-tutorial on how I make bread, but bear with me...I don't really use an exact recipe. It's entirely by method. For example, this is my "recipe"...lest I forget something that should be in there.
 DON'T PANIC...it's not brain surgery, it doesn't have to be exact. People have made bread out of anything they could paste to a hot rock and it's worked for all this time.
This is also going to be heavily laden with pictures, but I'll try to keep them small for the sake of loading.
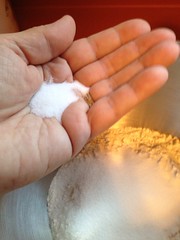
I start with 3 cups of flour. NOT self-rising. Just plain bread flour that's functional for things like pizza crusts and whatnot. Some flours are very "soft" and have a low gluten content, they make good biscuits, some are a little "harder" and still make good biscuits but are more versatile as well. To this, I add a couple tablespoons of sugar, and some salt. And this is where we always go off the rails, I have no idea how much salt, just "this much salt" is enough. I use sea salt, you might want to use a tad less if you use another type.
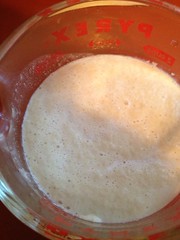
Now you need some warm water with a spoonful or two of sugar in it. I add a glop of milk and test the temp by sticking my finger in it. It should be very warm, but not too warm. You want the yeast to be happy, well-fed and we all know what environment yeast likes.
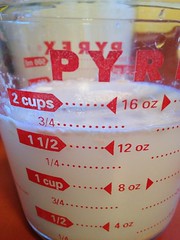 And yes, this amount of liquid should be about right for the amount of flour we're using. It's okay to have more liquid than you use. You don't have to use every drop although in this batch, it's exactly what I did use.
Add a package or a spoonful of Yeast to this liquid. If you are using packets, I recommend Hodgeson's Mill. I have a whole jar of yeast granules in my fridge that I bought cheaply at Sam's Club.
When it gets foamy, it's proofed, if it doesn't, throw it out and re-do this step. Yeast is living stuff, sometimes it simply dies or the water is too hot. Bathwater temp is best.
While the yeast is getting all bubbly, drop an egg and a tablespoon or two of olive oil in your flour. Or whatever oil you like.

Now the fun starts! If you have a Kitchen Aid type mixer or anything with a dough hook on it, this is the time to put it to work. About 2 minutes with that, or if you don't have this handy tool, get a strong spoon and if there's a kid underfoot, put him/her to work stirring until it looks right.
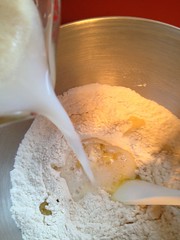
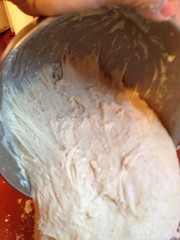
Pour the yeasty liquid into the middle of the flour and start stirring. It's going to get glumpy, then it will begin to smooth out and develop lovely strands, which is gluten developing.
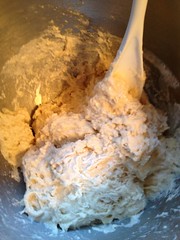
becomes:
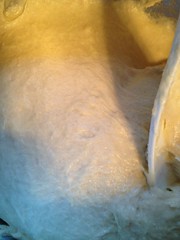
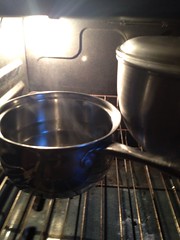
And when it's smooth like this, just set a lid on it and put it somewhere to rise. In winter if the house is cold, I boil a small pan of water and set it in the oven along with the container of dough. But really, just anywhere the dough won't be disturbed for a while.
Now you have done the amazing part of making bread. Go find pans for your creation...loaf pan, cookie sheet, pizza pan, whatever you want this to be. Grease it very lightly or use parchment paper. (I recommend parchment paper.)
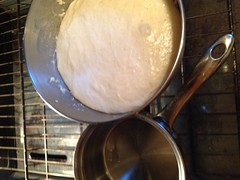
In about 30 or 40 minutes, your resting dough has probably doubled in size, cold winter days may take longer, but watch the dough, not the clock. This dough now has big gassy bubbles in it.
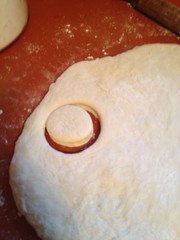
Dump it all out on a floured surface. This is the fun part!! Knead it a little to expel the large bubbles, this kneading will create the finer texture you want in bread.
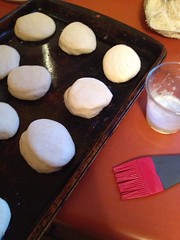
You may now roll it into a scrumptious pizza crust, cut it like biscuits, which is how I make hamburger buns..the thicker the dough, the larger the bun will be. (You can also wrap up dough and stash in the freezer. When you want it, let it thaw, rise a little and bake it just like freshly made dough.)
Make strips and tie them in pretty knots, be creative with your dough.
When I get it on the pan, I like to brush the tops with a little egg white and water whisked together.
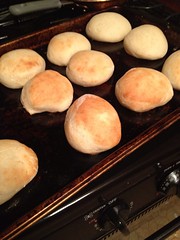
Let the formed bread have about 15 minutes or so to rise. I rest my dough safely inside the oven where children are less likely to poke at it. Unspoken rule at our house..if the light in the oven is on, don't mess with the oven.
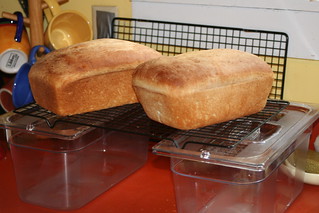
When the dough is fluffy again, I bake my bread at about 350 - 375 degrees. My oven is sadly no more exact than I am. Watch your buns the first time you make them and you can make your own adjustments. Let them brown lightly, the cooking time will vary with the form of your bread, a loaf will take longer, my rolls for this blogpost took around 17 minutes. I do have to put buns on a rack slightly above the middle so that the bottoms don't get crusty. Loaves go in the middle, as does pizza. Your oven may differ, mine is a little quirky.
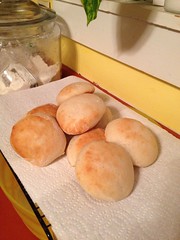
Your family is going to adore you. Some Amish butter, some homemade jam and it becomes a beautiful day.
Thursday, October 11, 2012

Subscribe to:
Posts (Atom)