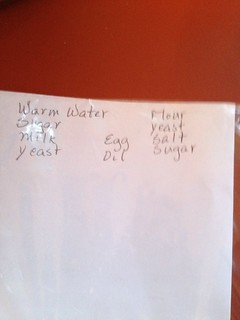
Okay, today I will post a semi-tutorial on how I make bread, but bear with me...I don't really use an exact recipe. It's entirely by method. For example, this is my "recipe"...lest I forget something that should be in there.
 DON'T PANIC...it's not brain surgery, it doesn't have to be exact. People have made bread out of anything they could paste to a hot rock and it's worked for all this time.
This is also going to be heavily laden with pictures, but I'll try to keep them small for the sake of loading.
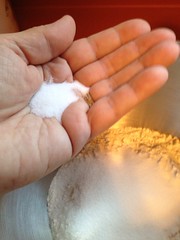
I start with 3 cups of flour. NOT self-rising. Just plain bread flour that's functional for things like pizza crusts and whatnot. Some flours are very "soft" and have a low gluten content, they make good biscuits, some are a little "harder" and still make good biscuits but are more versatile as well. To this, I add a couple tablespoons of sugar, and some salt. And this is where we always go off the rails, I have no idea how much salt, just "this much salt" is enough. I use sea salt, you might want to use a tad less if you use another type.
Now you need some warm water with a spoonful or two of sugar in it. I add a glop of milk and test the temp by sticking my finger in it. It should be very warm, but not too warm. You want the yeast to be happy, well-fed and we all know what environment yeast likes.
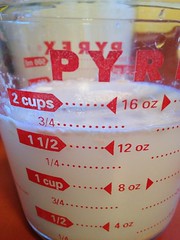 And yes, this amount of liquid should be about right for the amount of flour we're using. It's okay to have more liquid than you use. You don't have to use every drop although in this batch, it's exactly what I did use.
Add a package or a spoonful of Yeast to this liquid. If you are using packets, I recommend Hodgeson's Mill. I have a whole jar of yeast granules in my fridge that I bought cheaply at Sam's Club.
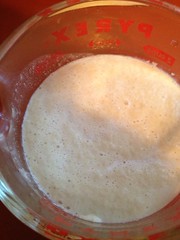
When it gets foamy, it's proofed, if it doesn't, throw it out and re-do this step. Yeast is living stuff, sometimes it simply dies or the water is too hot. Bathwater temp is best.
While the yeast is getting all bubbly, drop an egg and a tablespoon or two of olive oil in your flour. Or whatever oil you like.

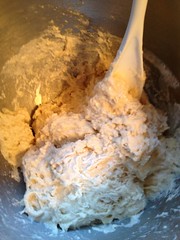
Now the fun starts! If you have a Kitchen Aid type mixer or anything with a dough hook on it, this is the time to put it to work. About 2 minutes with that, or if you don't have this handy tool, get a strong spoon and if there's a kid underfoot, put him/her to work stirring until it looks right.
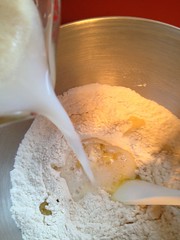
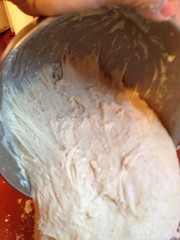
Pour the yeasty liquid into the middle of the flour and start stirring. It's going to get glumpy, then it will begin to smooth out and develop lovely strands, which is gluten developing.
becomes:
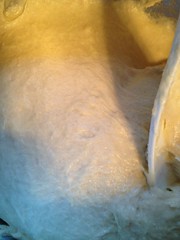
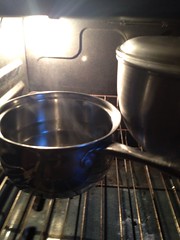
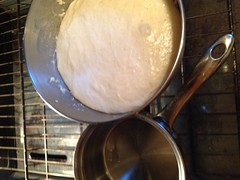
And when it's smooth like this, just set a lid on it and put it somewhere to rise. In winter if the house is cold, I boil a small pan of water and set it in the oven along with the container of dough. But really, just anywhere the dough won't be disturbed for a while.
Now you have done the amazing part of making bread. Go find pans for your creation...loaf pan, cookie sheet, pizza pan, whatever you want this to be. Grease it very lightly or use parchment paper. (I recommend parchment paper.)
In about 30 or 40 minutes, your resting dough has probably doubled in size, cold winter days may take longer, but watch the dough, not the clock. This dough now has big gassy bubbles in it.
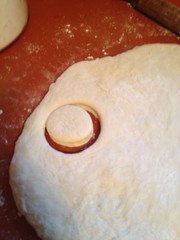
Dump it all out on a floured surface. This is the fun part!! Knead it a little to expel the large bubbles, this kneading will create the finer texture you want in bread.
You may now roll it into a scrumptious pizza crust, cut it like biscuits, which is how I make hamburger buns..the thicker the dough, the larger the bun will be. (You can also wrap up dough and stash in the freezer. When you want it, let it thaw, rise a little and bake it just like freshly made dough.)
Make strips and tie them in pretty knots, be creative with your dough.
When I get it on the pan, I like to brush the tops with a little egg white and water whisked together.
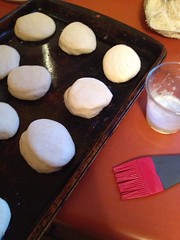
Let the formed bread have about 15 minutes or so to rise. I rest my dough safely inside the oven where children are less likely to poke at it. Unspoken rule at our house..if the light in the oven is on, don't mess with the oven.
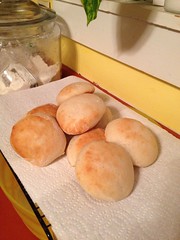
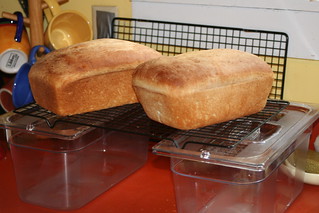
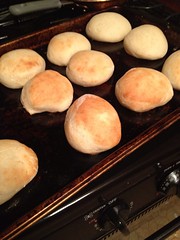
When the dough is fluffy again, I bake my bread at about 350 - 375 degrees. My oven is sadly no more exact than I am. Watch your buns the first time you make them and you can make your own adjustments. Let them brown lightly, the cooking time will vary with the form of your bread, a loaf will take longer, my rolls for this blogpost took around 17 minutes. I do have to put buns on a rack slightly above the middle so that the bottoms don't get crusty. Loaves go in the middle, as does pizza. Your oven may differ, mine is a little quirky.
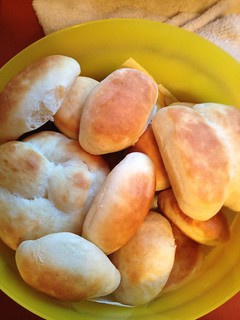
Your family is going to adore you. Some Amish butter, some homemade jam and it becomes a beautiful day.